Number “8” Birthday Cake

I already posted a blog here on Emma’s recent birthday.

I finally have the cake post ready!

I have been making my kids’ birthday cakes for a few years now. They certainly don’t look professional by any means, but they mean a lot to them (I hope!) and are fun.

This year I made a number “8” cake for Emma.

I used 2 boxes of cake mix, and 2 cans of frosting (probably could’ve used 3 frostings to be honest)…CHOCOLATE for both of course! There is no white cake mix in this house! 🙂 And don’t ask why the bananas are in this picture…this is just where they sit on the counter and they happened to be there when I was getting ready to bake the cake. ha ha!

I used 9 inch cake pans and baked 4 cakes (yes I had to use them twice since I only have 2, but they cooled pretty quickly in between).

I love this extra large 15 x 20 cutting board that I found at Walmart. I bought it for the sole purpose of setting up cakes because I needed something big enough to display them on.

This number cake is the first one I’ve ever made, and I’m glad that I chose an easy number for my first one.

Steps:

First I used the size of a small cup to cut out a circle in the center of each cake.

Then lightly frosted all 4 cakes.

Then I stacked them 2 cakes high (2 on 2).

Then all I had to do was cut off a little bit off the edge of each cake and smoosh them together to form the shape. (see picture) You can do whatever you want with these “cake scraps” since you don’t need them. I gave Laila a small pile of m&m s and let her decorate them. This kept her busy enough to leave the main cake alone while I finished it. It took me about 30 min to add all the m & m s.

Then frost all over and cover the top with M & M s!

If you are interested in baking a numbered cake, check out this link for how-to’s on cutting and piecing cakes to create numbered cakes.

Those goofy girls really enjoyed the cake after some swimming!

Linking up at…

So You Think You’re Crafty

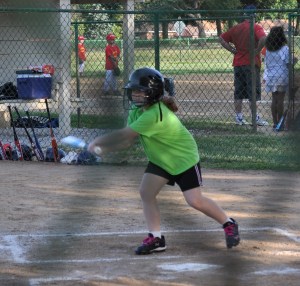
Little league snack night

There are many fun treats you can make with Rice Krispies. When I was little, my mom always made M&M Rice Krispie treats for me to take to school on my birthday. She added M&Ms into the mixture…it was my favorite!

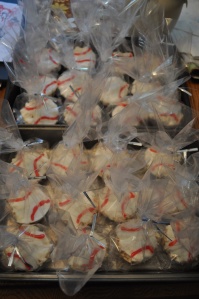
I saw this idea on pinterest and decided to make these baseball rice Krispie treats for my daughter’s little league team this week.

You just make the rice krispie mixture as usual. Then instead of spreading in a cake pan, you use wax paper to help push the mixture into muffin pans. That way, you get equal sized “baseballs”. Then you spread melted white almond bark on top and pipe the red lines on. I had planned on simply adding some red food coloring to the last of the melted almond bark to use for the red lines. Well, friends, that doesn’t work cause it immediately clumped…so off to Walmart I ran. And so glad I did because I found Cakemate Glitter Gels!

Ingredients used:

Rice krispies (9 cups)

Marshmallows (1 1/2 bags)

Butter

Almond bark

Red decorating gel

I used cellophane bags to individually wrap them. This recipe made 28 treats which was plenty extra for all the younger siblings that like to be included at snack time. They deserve it too after sitting through a 90 min game. Ok, they don’t sit, there’s a playground, snack bar, lots of other kids, etc, but still…

I wish I would’ve had the camera ready at the moment after the game when there was a mad rush of 18 little girls all scrambling for a treat bag and a Gatorade! Priceless!

GO TEAM!!

New Kitchenaid Mixer!

How FUN is this?!

Thanks to my amazing mama, my kitchen has a new accessory…my new Kitchenaid stand mixer! It has only been on my wish list for a short while, but she knows I love to bake. She came over last month to watch our kids while we went away for our anniversary, and surprised me with it. I’m loving the flat beater that scrapes the sides of the bowl so perfectly.

So naturally I had to spruce it up with a cute decal…or in my husband’s words “pimped it out”. There are so many cute decals out there (or you can print your own using vinyl) that it was hard to choose just one. They are all so much fun! I found a cute subway art style baking one on Etsy for 5 bucks! Once I opened it, I could tell that I was going to have trouble applying it as one whole sheet, so I decided I was going to have to use a little patience and apply the words individually.  I took a picture of the sheet prior to cutting so that I could refer to it for each step. And mine came with a handy little craft stick to help transfer the letters.

This is what the vinyl decal looks like when you open it.

All you do is

1. peel off the backing

2. use the stick to rub the edges of the letters onto your material

 3. peel off the transfer paper…EASY!

You can still see the transfer paper on the word "eggs". This peels right off after rubbing the letters onto the material.

Top view

So far, I have made banana bread, coffee cake, and even mixed meatloaf with my new love! And I have so many new recipes I cant wait to try out thanks to my Mops group. A fellow Mops mom compiled recipes from everyone and we made these adorable cookbooks.

This is my sour cream coffeecake all ready to go to MOPS! I used a recipe I found on Brown Paper Packages‘ blog. It looked so good after baking that I skipped the whole glaze step. It was so scrumptious that I only had a couple pieces left to bring home!


Another accessory adorning my kitchen…

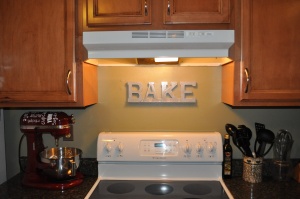
BAKE letters!

The idea was inspired by a kitchen update I saw at Lemonade Makin Mama. I do not have a lot of wall space in my kitchen so I just made mine on a smaller scale. I bought the wooden letters at Michaels and spray painted them silver.

With my new kitchen decor, I am looking forward to baking dessert for Easter this weekend!

Bakin’ and Bloggin’

I’ve been pinning lots of recipes lately on Pinterest and thought I’d share a few of them.

For some reason I’ve been in a “baking” mood lately. Every once in awhile this mood strikes me and I just go with it. Sometimes I do a lot in one day, other times I do a little each day for a week or so.

Here are the recipes I’ve been enjoying lately:

1. Strawberry banana streusel bread that I found at All Day I Dream About Food. The name of the blog had me intrigued even before the name of the recipe! I have never even baked with strawberries before but everyone in this house loves them so I knew it could stand a good chance of all thumbs up! And it turned out great…perfect for breakfast with your morning coffee. Here is a pic of my finished loaf:

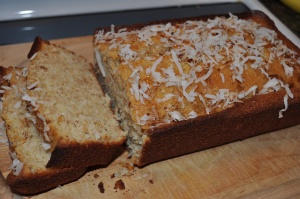
2. Key lime yogurt coconut bread from ellysaysopa. The recipe calls for key limes, but since there are no key limes in this area, I used regular limes and it was really good! I will add this one to my recipe binder and will definitely be making this again. Here is a pic of my finished loaf:

3. Black bean brownies! A friend of mine brought these over one night and had us try them before she told us what the secret ingredient was. We all loved them and didn’t notice anything different. I couldn’t believe they were made with black beans! I looked up several black bean brownie recipes online. I was thrilled to learn that you don’t need ANY ingredients besides brownie mix and a can of beans! No eggs, no oil! So if you’re looking for a way to add some extra fiber and protein, while cutting back on fat and calories, I highly recommend these! I was a little scared with my first batch so I did sprinkle a handful of chocolate chips on top before baking. Both kids and the hubby devoured them! And if you do taste the beans slightly (which I did but maybe just because I baked them and knew the secret), just spread on some frosting and you’re still getting the extra benefits from the beans. I snapped this picture before the frosting but they were much more enticing afterwards.

4. Berry Oatmeal Cups from Greenlitebites. These muffins are perfect for any of us on a busy school morning. And with hubs working from home, they are perfect for him to come upstairs and grab for a quick breakfast or snack on his breaks.  . I just made these tonight and he actually said “I could sit and eat a whole handful of these!” SCORE!! Yay me!! I did add chocolate chips on top of about half of them to help entice the kids. Hey, if it takes a few chocolate chips to get some oatmeal and berries in their systems, I’m all for it!

…And since I needed something to wash all these carbs down…

5. Green smoothie. This recipe is also from Pinterest. I used strawberry banana yogurt and added crushed ice and it tasted like a strawberry banana smoothie! Hubs and I liked it, the kids not so much, but they are accustomed to my basic peanut butter banana chocolate smoothies and nothing tops those…yet.

So that’s what I’ve been up to lately in the kitchen.

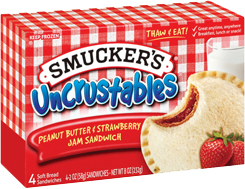
Uncrustables!

My kids are cuckoo for Smuckers Uncrustables!

They love PB & J but they won’t eat the crusts.

The problem: Uncrustables cost $6 for 10 sandwiches!

(even Aldi’s brand costs $8 for 4 sandwiches)

So what do I do in a case like this? MAKE MY OWN!!

You got it, DIY Smuckers Uncrustables!

You’ll need…you guessed it…peanut butter, jelly, and bread.

I also invested in this handy little tool but you don’t have to. You could easily cut the crusts off using a cookie cutter, and pinch the edges together, but I love this tool that I ordered from Amazon. there are several on the market so pick your favorite, or just use your own method.

After spreading the PB&J, I individually wrapped them in plastic wrap, put them in ziploc freezer bags, and placed them in the freezer…in the original Uncrustable box so the kids know exactly where to find them when they’re looking for them. I’m not fooling them at all – they know these are made by Mom but they eat them anyway.

They are perfect for school lunches and after-school snacks!

And because there’s no such thing as too healthy, I have taken it a step further and decided to add my own secret healthy punches to these snacks. Have you heard of the Sneaky Chef line of cookbooks by Missy Levine? I love this idea of pureeing fruits, veggies, beans, etc and “sneaking” them into all sorts of foods to get extra nutrition into your kids’ diets. I have been adding the orange puree to our pasta sauce, the purple puree to our brownies, and the white bean puree to our cookies and muffins for years. She also suggests adding white bean puree to peanut butter to add more nutrition. So I did! In case you were wondering about the white dollop on top of the peanut butter in the pictures above, its the puree.

All you need to make white bean purée:

Drain and rinse the beans, then purée them with 1-2tbsp water in your food processor. I portion them out using ice cube trays, let them freeze, then pop the cubes into a ziplock freezer bag. Then I pull 1-2cubes out each time I am ready to add some to some of my recipes.

And the kids still loved them! Now, I’m not sure exactly how much healthier mine are compared to the name brand, but if you use whole wheat bread, natural peanut butter, and reduced sugar jelly, you are already doing your family a favor. I love being able to control how much nutrition goes into these. You can use your favorite bread (white or whole wheat), use whatever peanut butter you prefer (omega 3 or organic) and whatever jelly you prefer (you could even make your own jelly).

my Uncrustables:

Total Cost:

3 loaves bread…$3

1 jar peanut butter…$4 (I used 1/2 tbsp for each sandwich and still have 1/2 jar left)

1 jar jelly…$2 (I used 1/2 tbsp for each sandwich and still have 1/2 jar left)

So let’s break this down.

Since I only used 1/2 jars, my $6 made 30 sandwiches, compared to $6 for 10 for store-bought sandwiches.

That’s TRIPLE the savings!!!

So if you are buying Uncrustables, do yourself a favor and try this out to save a little $$.

Or if you just make a lot of PBJs, do your family a favor and see how healthy you can make this, while saving yourself some time in the kitchen each day!

Fun with cinnamon rolls

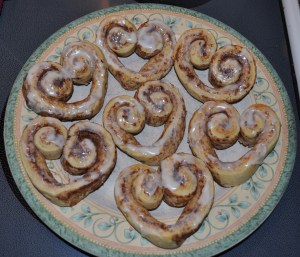
I saw these heart shaped cinnamon rolls on Pinterest a few weeks ago, and meant to make them for Valentines Day. I was only a couple days late but I do love my kids every day so I guess it’s ok if Imake them on days besides February 14, right?

Here is my version. They were just as easy as regular cinnamon rolls. I just bought a can of them at the store. All you do is gently unroll it, leave the inside curl, curl the opposite end, shape it into a heart shape, and pinch the bottom to make a point.

As I was taking the picture, I decided that next time I make cinnamon rolls, I want to do something even more fun, so this morning I decided to spell my kids’ names out with them. I managed to spell both their names using only 1 can. I even added a heart and at the request of one of the kids, a clover! Yeah, that’s supposed to be a clover in the lower right corner.

This picture is probably not going to win any food blog awards since it is not the prettiest,

but it is fun for a 7 year old and a 3 year old to get to pick out a letter from their name to eat.

So for .40 cents  per can, (I bought these last week when the Pillsbury rolls were on sale for $1, plus I used a .30 cent coupon that doubled) I was able to make one very special breakfast. I actually bought 7 cans that day since i had extra coupons, so if you think of any other fun ideas for cinnamon rolls, please let me know!

Learning moment opportunity: For .40 cents, my second grader could tell you that you could use 1 quarter+1 dime+1nickel, 4 dimes, or 40 pennies. Yes she is learning how to count money, make change, and even write a check! No kidding! I think I better hide the checkbook soon!  Either that or teach her how to pay the bills for me! 😀

Happy Valentines Day!

I hope everyone had a lovely Valentines Day!

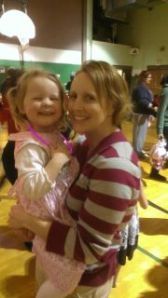
Ours started off with a Sweetheart Dance last week. The preschool that our youngest goes to hosts this every year for all the kids and their families.  I’m so thankful to be married to a thoughtful man – he thought ahead and ordered them corsages for the dance! How sweet is that?! He is a true romantic – it is so nice after Christmas to sit back and let him plan for Valentines. He always spoils us! Tonight he surprised us with 3 roses, one for each of “his girls”, and chocolates too.

Sweetheart Dance

Parties

Today, both girls had Valentine parties at their schools. Laila wore her new Love tee that I made her a couple weeks ago.  For 3-4 yr olds, they are happy enough exchanging Valentine cards. Here she is looking through her goody bag after she got home:

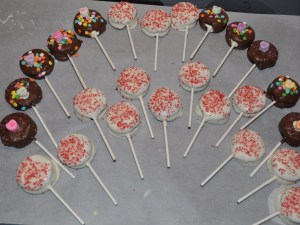
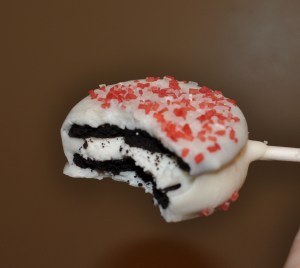
For Emma’s class, I made these really cute Oreo pops that I had pinned on pinterest from HipHipHooray. It took me awhile to figure out the trick, but I managed to have enough decent ones for everyone in the class to have 1. The trick is to use melted chocolate to set the lollipop stick inside the cookie, and allow it to set BEFORE you dip the cookie in chocolate. I made several of these that fell apart, and I was about to give up until I figured that out. The melted chocolate really adds a lot of weight to the oreos and they just don’t stand a chance without some “glue” holding the insides together.

Oreo Pops

Minute To Win It Game

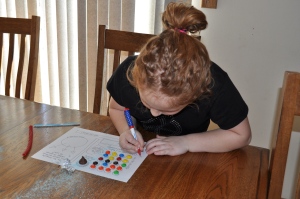
For Emma’s class (2nd grade) I usually plan a game for each classroom party. Last year I did Valentine Bingo. This year I wanted something different. Our church hosted a Minute To Win It game night recently for families and the kids really got into it, so when I found this Minute to Win it game idea on pinterest, I knew I had to try it out. I printed a game sheet for each student and gave each of them a snack size bag of the candy that they would need for the game (the Red Vines didn’t fit in the bags so I had one of the students pass them out):

They had to follow directions by:

1) bite off each end of the Red Vines

2) dump the pixy powder into the circle, then blow it out of the circle using the Red Vine

3) open the kiss using only 1 hand

4) then arrange the M&Ms and complete the math problem.

They had so much fun with this!

Like a true scientist,  I had Emma test it out for me at home first:

It was definitely a hit and the best part was that everyone got the right answer because everyone’s combination of M&Ms was different! They got so excited yelling out their answers to see if anyone else had the same answer or not.

Happy Valentines everyone! And go tell someone you love them!!

1 Corinthians 13:7    Love bears all things, believes all things, hopes all things, endures all things. More

Another January Birthday

Yes our family has a few January birthdays, 5, to be exact. But this person is getting spoiled the most…my husband!

He does so much for our little family so he deserves only the best. We went on a fun family outing on Sunday. Then yesterday my girls and I put on our aprons and got to work! Since he is a sports fanatic, I decided to make a football cake. This was actually very simple – no rearranging cake pieces, no fancy decorating tips, only 2 colors of icing and I didn’t even need food coloring since I just needed the basic chocolate and vanilla!

Here is the football cake:


And here is a picture of him with our girls; they are so lucky to have him for a Daddy!


I am trying out a few new recipes this week and so far I’m 2 for 2! Tonight I made Slowcooker Cashew Chicken from  {http://www.365daysofcrockpot.com/2009/12/day-336-cashew-chicken.html} and it was delicious! I will share the others as soon as I try them all out. But tonight’s homemade Chinese was a hit!

Happy Birthday Honey!!

We also celebrated our youngest’s first day of preschool today. She fit right in and did great and told her teacher “I’ll come back tomorrow, okay?” so I think that means she loves it. We’re a little sad now that both girls are at “school” for atleast a couple hours during the day, but it gives me just enough free time to explore more thrifty crafty ideas, and more time to spend on my blog.

Here is a picture of her this morning all ready to go:

Happy Birthday to my Dad!

Happy Birthday to my Dad!
He has the biggest heart of anyone I know and is a wonderful father and grandfather.

I happened to see a recipe recently on Pinterest for almond joy brownie bites (http://www.confessionsofacookbookqueen.com/2011/04/almond-joy-brownie-bites/)

and pinned it. Then I remembered that my Dad loves almond joy bars. So I had to give the recipe a try and they were a huge hit! Since I’m not used to making brownie bites, I didn’t realize how fast they cooked so they were in the oven a tad longer than they should have been. But they are the cutest things ever and a perfect sized snack. I could hardly keep the kids away from them…until I put the coconut on…I don’t know about everyone else’s kids, but mine won’t go near coconut. But they were worth it thanks to a fairly easy, budget-friendly recipe (a total of $7…I already had enough almonds on hand since you only need 1 for each bite). And of course they were fun to make…who doesn’t love dipping things into CHOCOLATE?!


Here is a picture of this treat – I am realizing I need to brush up on my photography skills (ok I need to learn a lot) so that I can post great pictures of my products!  I HAD to take a bite so that you could see what makes it so delicious. The best bite is the very center, where you get brownie, coconut, chocolate, and the crunchy almond! As Rachael would say “YUM-O!”

So, Dad, ENJOY!!!

Almond Joy Brownie Bites